


This video is also available on YouTube.
Here is a PDF version of these instructions. DOWNLOAD PDF
Select any image to open a larger version in a new tab or see a step by step instructions with larger images. One step per page.
-
 The
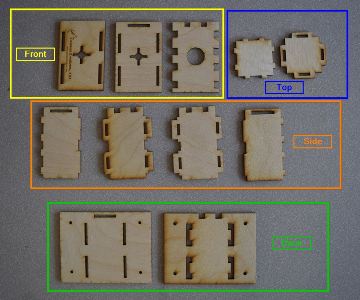
parts: Top, Front, Back, and Sides.
The
parts: Top, Front, Back, and Sides.
Not shown in the picture is a 1/4" X 20 T-Nut.
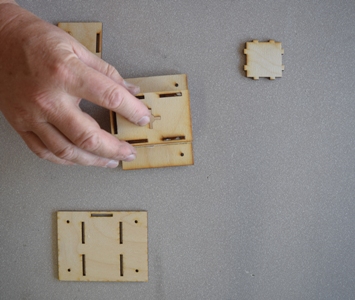
If you arrange the pieces on your work surface as shown it will be easier to follow the instructions. -
 Take
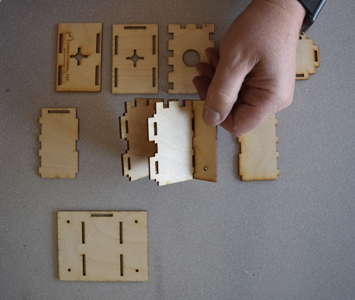
the two inner sides and slip them into the back. The crenulations
all go up.
Take
the two inner sides and slip them into the back. The crenulations
all go up. -
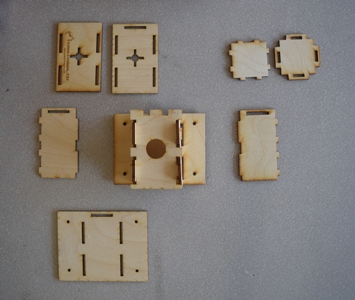 Next
slip the inner front piece with the large round hole onto the assembly.
Again the crenulations all go up.
Next
slip the inner front piece with the large round hole onto the assembly.
Again the crenulations all go up. -
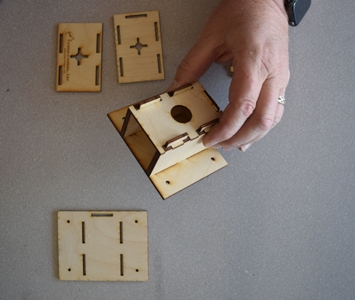
 Next
add the inner top piece. At this point the assembly will be some
what stable.
Next
add the inner top piece. At this point the assembly will be some
what stable. -
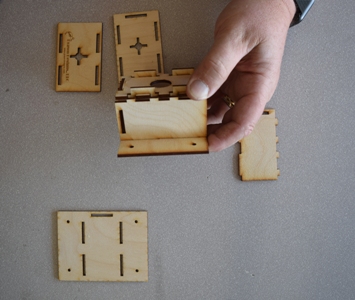 Next
test fit one side. The sides are a tight fit, be sure to press the
side into the back as far as possible.
Next
test fit one side. The sides are a tight fit, be sure to press the
side into the back as far as possible. -
 Next
test fit the other side. The sides should close all the way flat.
Next
test fit the other side. The sides should close all the way flat. -
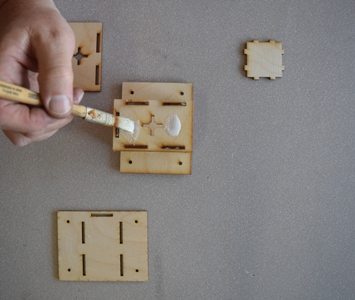
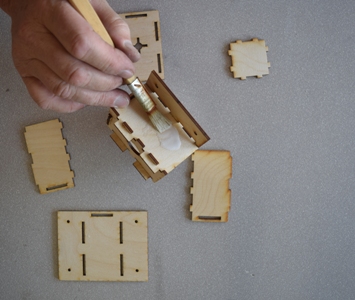 Take
the sides off and spread glue on the inner side.
Take
the sides off and spread glue on the inner side. -
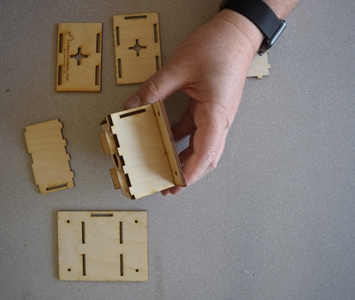 Install
the sides.
Install
the sides. -
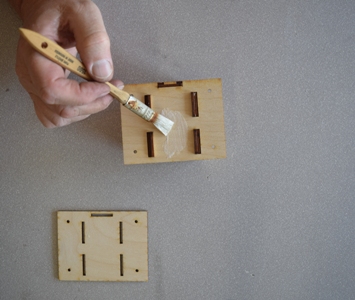
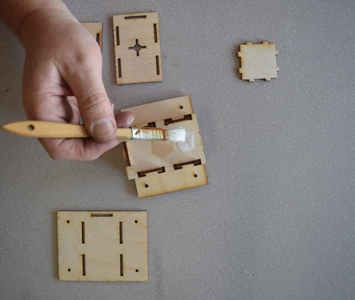 Spread
glue on the front. Note, the front has three pieces; the inner one
has the large round hole, the outer one has engraving on it, the
middle one has 5 slots (two on each side and one on the top).
Spread
glue on the front. Note, the front has three pieces; the inner one
has the large round hole, the outer one has engraving on it, the
middle one has 5 slots (two on each side and one on the top). -
 Place
the middle front on the assembly.
Place
the middle front on the assembly. -
 Spread
glue on the middle front.
Spread
glue on the middle front. -
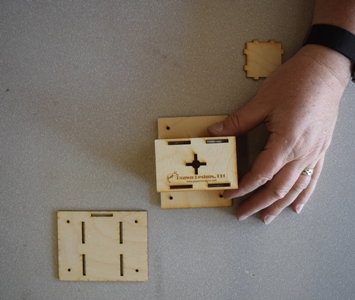 Put
the outer front on the assembly.
Put
the outer front on the assembly. -
 Spread
glue on the top and place the top on the assembly.
Spread
glue on the top and place the top on the assembly. -
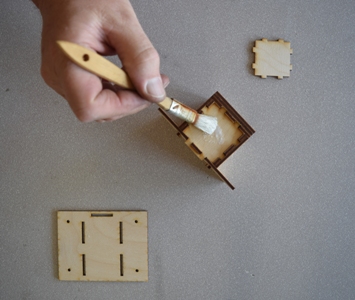
 Spread
glue on the back.
Spread
glue on the back. -
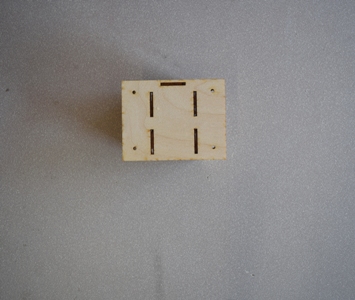 Place
the back on the assembly.
Place
the back on the assembly. -
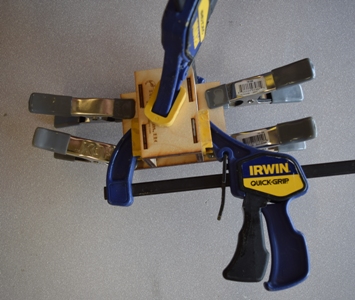 Clamp
the assembly and let it dry.
Clamp
the assembly and let it dry. -
 After
the assembly is dry, glue the T nut into the assembly from the inside.
I recommend a two part epoxy. Do not get any glue on the threads.
After
the assembly is dry, glue the T nut into the assembly from the inside.
I recommend a two part epoxy. Do not get any glue on the threads. -
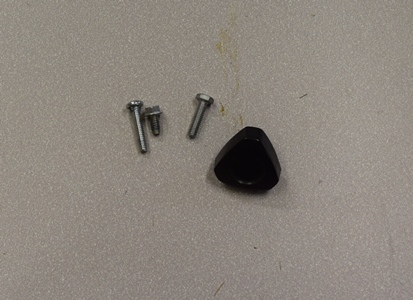 You
can use many different types of 1/4" X 20 bolts to "clamp" the leg into the
leg pocket. Bolts are not included in the kit. Prawn Designs has Thumb Screws available for an extra charge.
You
can use many different types of 1/4" X 20 bolts to "clamp" the leg into the
leg pocket. Bolts are not included in the kit. Prawn Designs has Thumb Screws available for an extra charge. - Mount the leg pocket into your module.
- Setup your modules with some friends and run trains.


